Understanding the foundational elements of 3D modeling is crucial for anyone diving into this creative field. Meshes, vertices, and polygons form the core components of any 3D model, each playing a unique role in shaping and defining digital objects. Here’s a breakdown of these essential terms:
Meshes #

Definition: A mesh is a collection of vertices, edges, and faces that define the shape of a 3D object in digital space. Think of it as a wireframe that outlines the structure of your model. Importance: Meshes are critical because they represent the visual and structural integrity of your 3D designs. They determine the complexity and detail of the object, impacting both aesthetics and performance in simulations or visualizations.
Vertices #
Definition: Vertices are points in 3D space where two or more edges meet. They are the precise coordinates that help define the shape of an object. Importance: Vertices are the anchor points of your model. They allow you to manipulate the shape and size of your meshes. By moving vertices, you can create intricate details or drastically alter the model’s appearance.
Polygons #
Definition: Polygons are flat, two-dimensional shapes that are formed when multiple vertices are connected. In 3D modeling, the most common polygons are triangles and quadrilaterals.
Importance: Polygons make up the surface of your 3D models. The arrangement and number of polygons can greatly affect the model’s quality and realism. Models with more polygons (often referred to as “high-poly”) have more details and smoother surfaces, but they require more processing power. By mastering these elements, 3D modelers can craft everything from simple models for mobile games to complex characters for blockbuster movies. Understanding how meshes, vertices, and polygons work together enables artists to create, refine, and optimize their 3D projects effectively.
Your First 3D Model in Blender: A Step-by-Step Guide to Creating a Simple Coffee Cup #
Embarking on your 3D modeling journey can be thrilling yet intimidating. Blender, with its powerful suite of tools, offers a great starting point for beginners. Let’s dive into a simple project—modeling a basic coffee cup—to help you get comfortable with Blender’s interface and fundamental modeling processes.
Step 1: Setting Up Your Workspace #
Action: Open Blender and create a new project. Clear the default cube by right-clicking it and pressing ‘Delete’. Tip: Use the middle mouse button to rotate your view, scroll to zoom in and out, and hold ‘Shift’ plus the middle mouse button to pan your view.
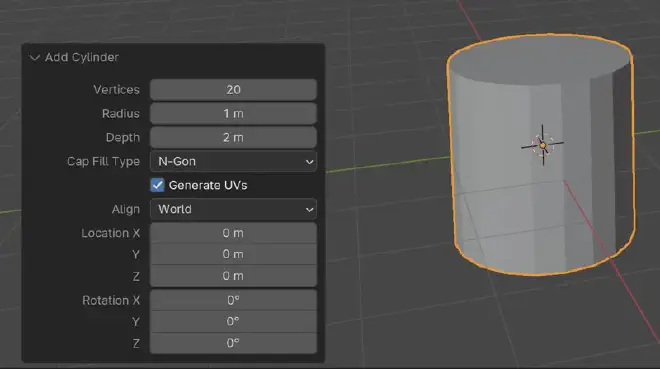
Step 2: Adding a Cylinder #
Action: Press ‘Shift + A’ to open the Add menu, select ‘Mesh’, and then ‘Cylinder’. This will be the base shape for your coffee cup.
Tip: In the Add Cylinder options (bottom left), set the vertices to 20 for a smoother circular shape.
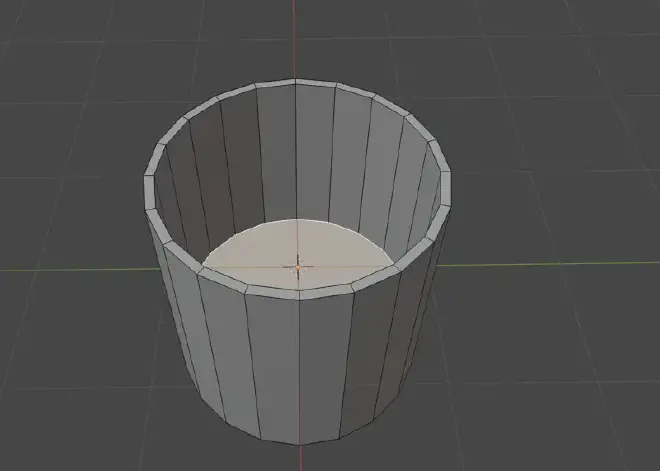
Step 3: Shaping the Cup #
Action: Switch to Edit Mode (Tab key). With the top face selected, press ‘I’ to inset the face slightly, then ‘E’ to extrude it downward to form the inner wall of the cup.
Tip: Ensure proportional editing is turned off (toggle with ‘O’) to avoid unintended adjustments to nearby vertices.
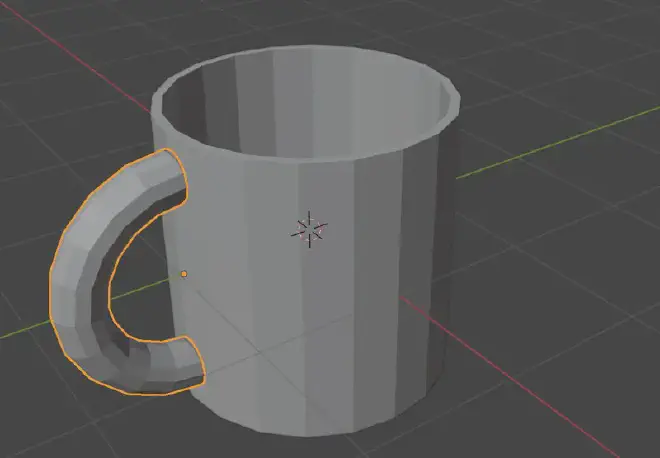
Step 4: Creating the Handle #
Action: In Object Mode, add a Torus by pressing ‘Shift + A’, selecting ‘Mesh’, and then ‘Torus’. In Edit mode select half of the Torus mesh and delete it. Rotate it then 90 degree on the Y axis.
Position the half Torus beside the cup to resemble a handle.
Tip: Use the Scale (‘S’) and Rotate (‘R’) tools to adjust the torus size and angle to match a comfortable handle for a cup.
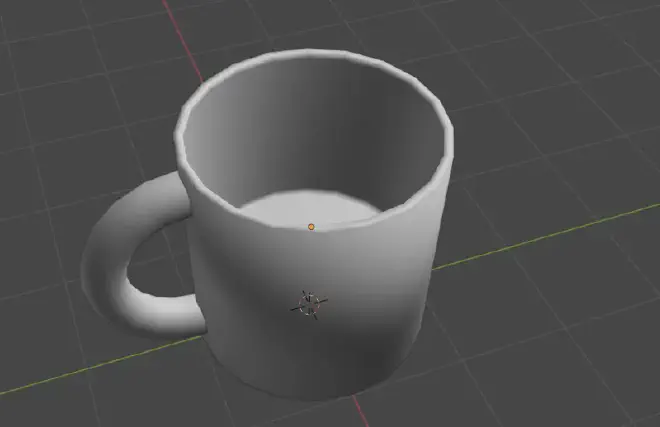
Step 5: Fine-Tuning and Smoothing #
Action: Select the coffee cup and the handle, right-click and choose ‘Shade Smooth’ to give your model a smoother appearance.
Tip: Add a modifier such as ‘Subdivision Surface’ to increase mesh smoothness without manually adding more geometry.
Step 6: Rendering Your Model #
Action: Set up a simple three-point lighting system and position a camera. Switch to the ‘Render’ tab, select ‘Cycles’ or ‘Eevee’, and click ‘Render’ to see your finished product.
Tip: Adjust light strength and camera angles to highlight the best features of your model.