Welcome to Part 1 of this Godot(v4.2.2) tutorial! In this guide, you’ll learn how to create a Doodle Jump clone from scratch. We’ll cover everything from basic setup and Player controls to dynamic platform generation and mobile (iOS) deployment.
1. Scene Setup #
If you still need to do so, please visit the Godot website, download the latest version, and open a new project. Since we want to deploy this game to mobile, please select the mobile renderer.
Setting up the main scene #
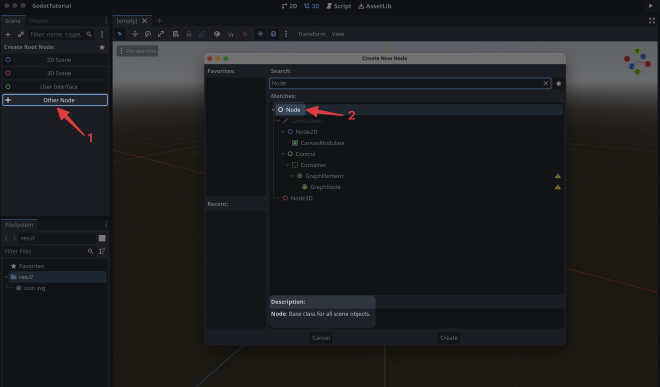
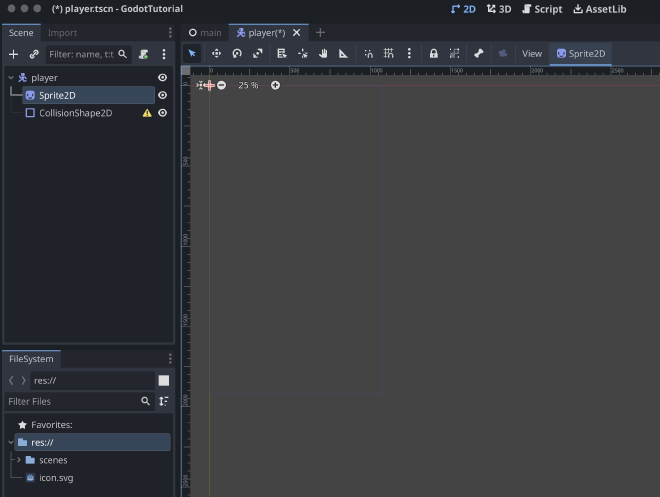
We start by creating the main scene using a regular node. To do so, select Other Node in the left menu and then search for Node.
Once created, rename the scene to e.g. main, and save it. It is a good habit to create folders right at the start to keep organized when your project grows, so generate a scene folder and save the main scene there.
Project settings for mobile #
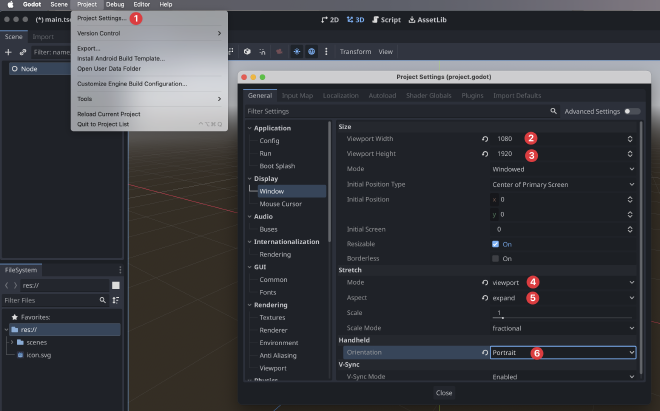
Since we want to deploy the game to mobile (iOS), we can make the following changes in the project setting.
- Go to Project - Project Settings and Display - Window.
- Change the Viewport With to 1080.
- Change the Viewport Height to 1920. This is a commonly used size to work with most mobile phones.
- Change Mode to viewport.
- Change Aspect to expand.
- Since this is a jump game, change the Orientation to Portrait.
2. Setting up the player node #
With the setup out of the way, we can start with the more interesting part: setting up the Player!
For this, we need to do the following:
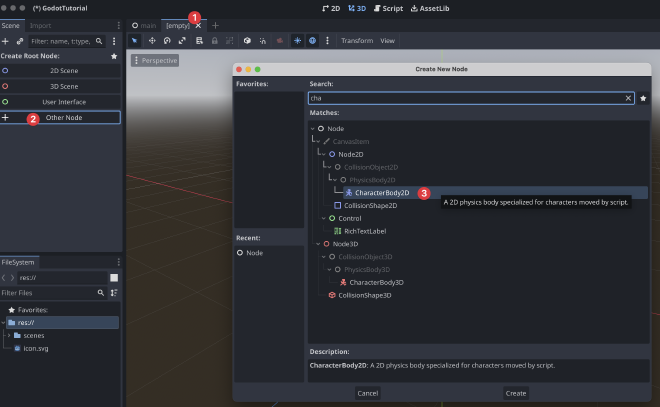
- Add a new scene via the + icon.
- Click on Other Node again to see all available nodes.
- Select the CharacterBody2D Node.
- Create the scene and save as e.g. Player.
Player Sprite #
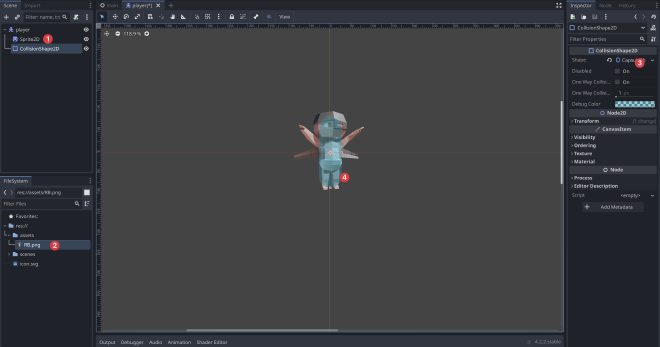
The CharacterBody2D is excellent for making the Player move. Since we cannot see anything at the moment, we need to add child nodes. First, we need a Sprite2D to make the Player appear on the screen and Second a CollisionShape2D so the Player can interact with other objects.
The player scene should look like this now.
With these nodes in place, we can now start adding a player image to the Sprite2D. I am using RocketBaby, a character I designed using Blender, but you can use any image you like.
- Select the Sprite2D Node.
- From the assets folder, drag and drop your image into the Texture field of the Sprite2D Inspector.
- Select now the CollisionShape2D Node, and under Shape select the Capsule.
- Adjust the size of the Capsule using the handle to make it cover most of the Player.
Player collision #
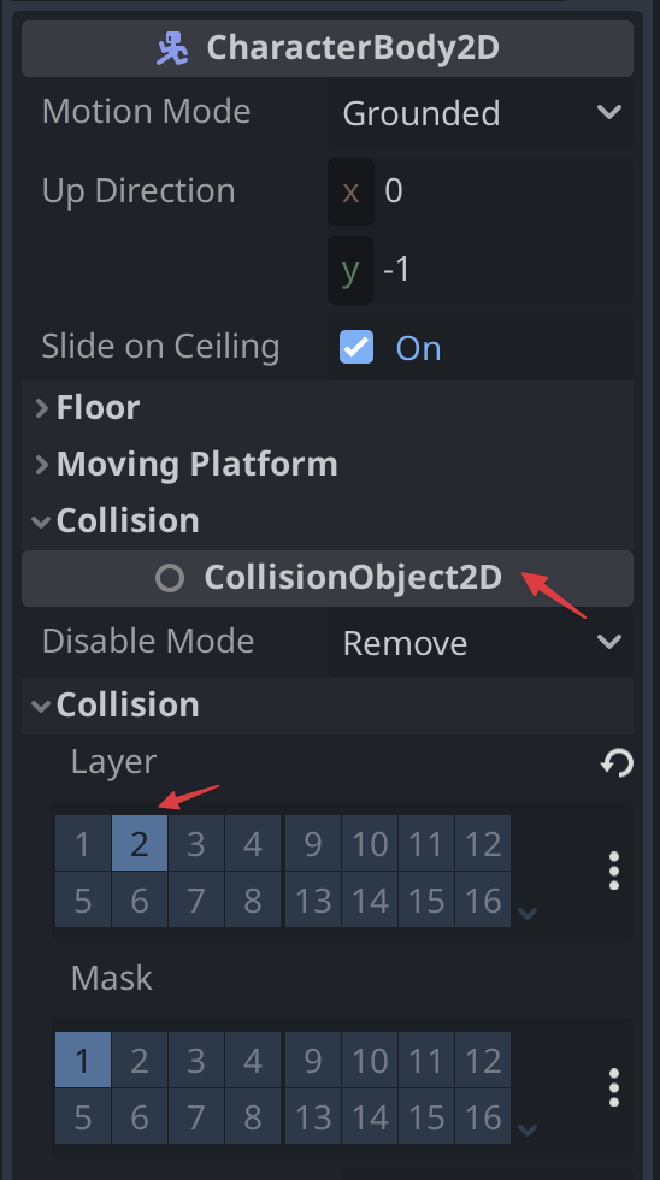
In order to make it easier for other objects to interact with the Player going forward, we need to assign the Player Node (CharacterBody2D) collision layer to a different number e.g. 2. Now all other Scenes that need to interact with the Player can scan for Mask 2 and we are sure it is the Player they interact with.
The visual part of the Player is done. Of course, you can enhance the player visuals by using an AnimatedSprite2D, but for this Tutorial, we keep it simple.
Implementing player movement (left and right) #
For the Player to move we need to add a script. The good thing about using a Character controller is that Godot provides an excellent movement script that can be used out of the box. However, we need to change it a bit.
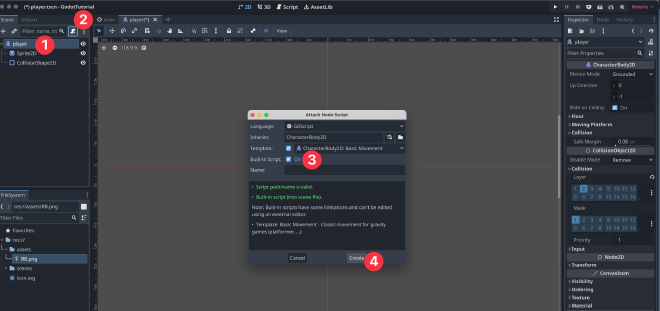
- Select the Player Node
- Press the little document button with the green plus to create a script.
- Tick the checkmark box to get the movement script Godot provides.
- Press Create to open the Script Editor window to see the standard movement script.
We will change the standard script to the following make it suitable for this game.
extends CharacterBody2D

# Constants
const SPEED := 325
const TILT_SENSITIVITY := 0.25

# Signals
signal new_height_reached(new_height)

# Member variables
@onready var screen_size = get_viewport_rect().size

var gravity = 2000
var max_height_reached = 0

func _ready():
 max_height_reached = position.y  # Initialize max height to the starting Y position

func _physics_process(delta):
  # Add the gravity.
  if not is_on_floor():
 velocity.y += gravity * delta

  # Handle horizontal movement using MOBILE accelerometer input.
  #var direction = Input.get_accelerometer().x
  #velocity.x = direction * SPEED if abs(direction) > TILT_SENSITIVITY else move_toward(velocity.x, 0, SPEED)

  ## Handle horizontal movement using KEYBOARD input.
 var direction = Input.get_axis("move_left", "move_right")
 velocity.x = direction * SPEED if direction else move_toward(velocity.x, 0, SPEED)


  # Check if a new highest point has been reached.
  if position.y < max_height_reached:
 max_height_reached = position.y
 emit_signal("new_height_reached", position.y)  # Emit signal with the new height

 move_and_slide()
 screen_wrap()

# Wraps the Player's X position around the screen edges.
func screen_wrap():
 position.x = wrapf(position.x, -screen_size.x / 2, screen_size.x / 2)
Hopefully the comments help to understand what the code does. In summary it allows the Player to:
- move left and right based on either keyboard input or by tilting the phone(accelerometer).
- it emits a signal once a new higher high is reached. We use this to generate the platforms but more on this later.
- it causes the Player to appear on the other side of the screen (wrap) once left one of the sides.
Add the Player Scene to the Main Scene. #
One of the things I like the most using Godot is that you can split a game into small chunks (or scenes in this case) and once you done add all scenes together.
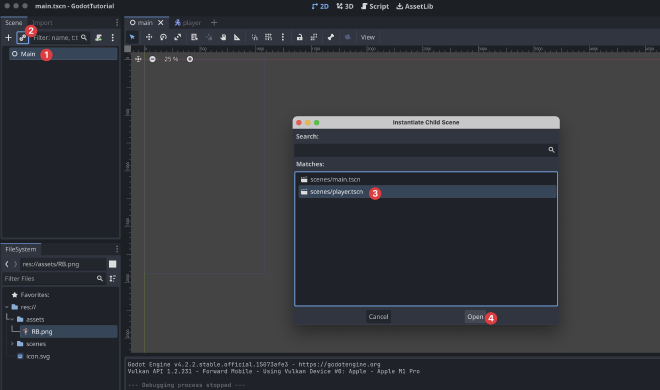
With the Player scene complete, lets add it as a child to the main scene.
- Go back to the Main Scene.
- Press the little Chain Icon to open the Instantiate Child Scne.
- Select the player scene.
- Press the Open button.
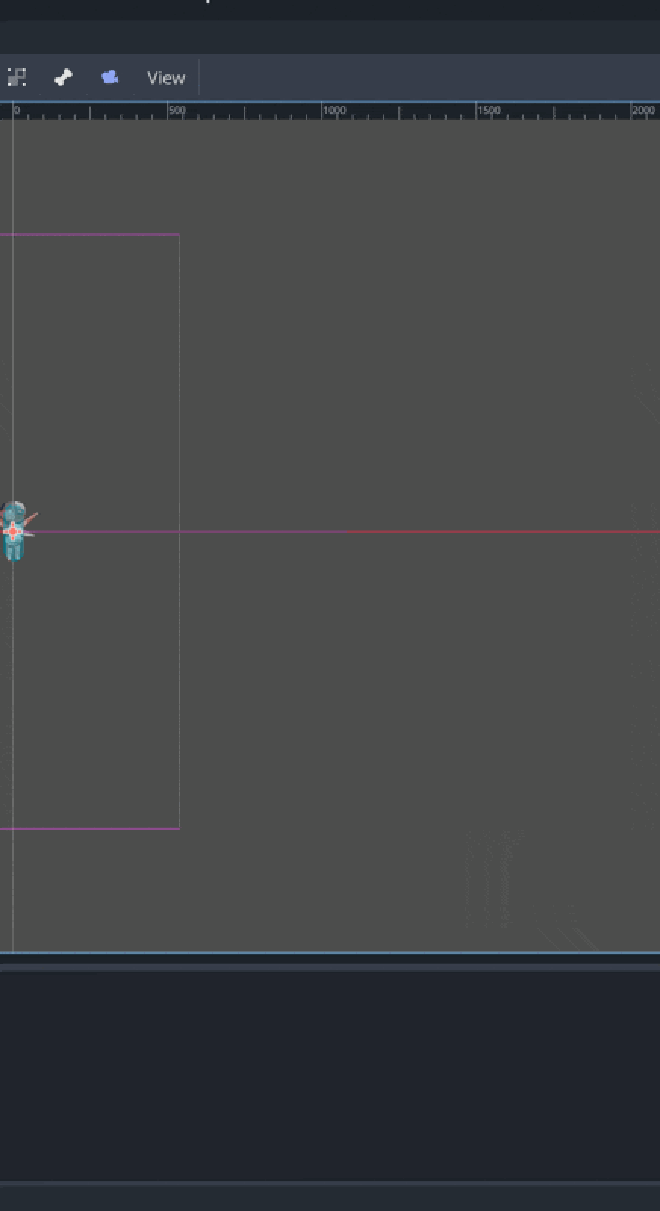
The Player should now be child of the main scene and visible at the center of the main scene.
Adding a Camera to the main scene #
Awesome! We have the Player in the main scene but in order to see it we need to add a camera as well. Luckily this is very easy.
- Be sure to be in the main scene.
- Press the little plus icon that says Add Child Node.
- Look for Camera2D and add it to the main scene.
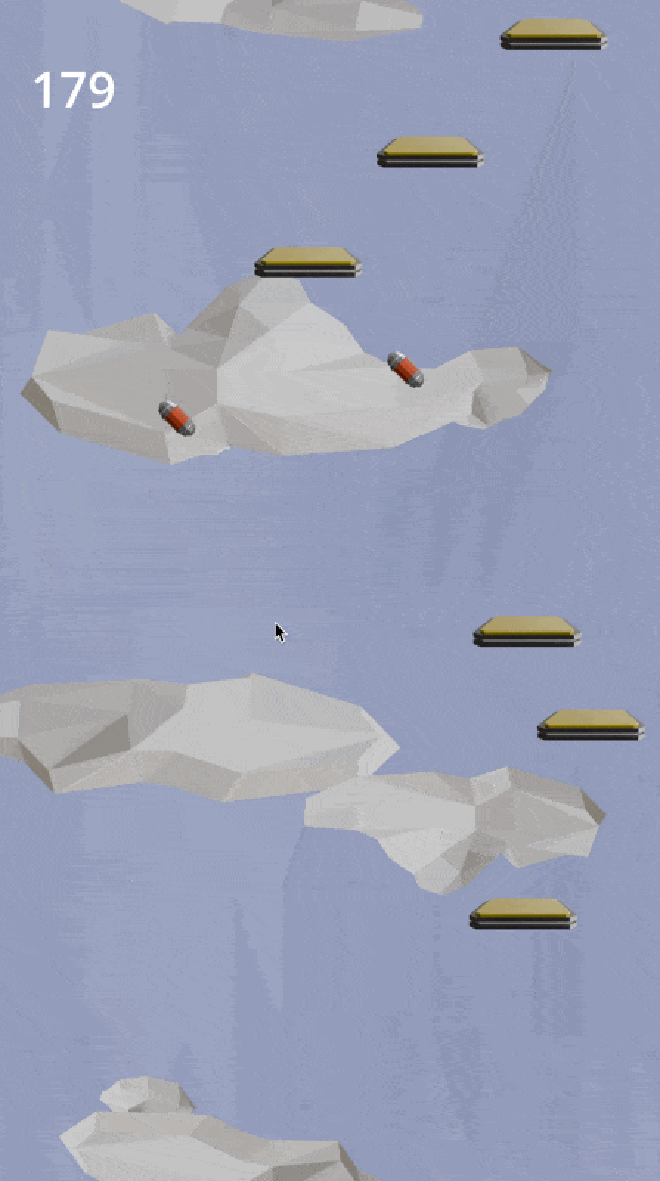
Press the Play Button and a new window should open where you see the gravity of the player script is working and the player is falling down. In the next Tutorial we will add Platform that will boost the player up once hit from the top.
Conclusion #
We covered how to use Nodes and scenes in Godot at the very basic level, specifically how to create a Main and a Player scene and combine them.
Stay tuned for Part2 of the Tutorial were we will add a Platform scene and more scripting to make the Player interact with the Platform and Jump once hit.